In the “Add-ons” tab on your app console click on the Memcached Cloud add-on, and choose your Memcached Cloud plan.
Once Memcached Cloud has been added, you will notice three new enironment variables:
MEMCACHEDCLOUD_SERVERS, MEMCACHEDCLOUD_USERNAME, MEMCACHEDCLOUD_PASSWORD
in the Configuration variables tab on your app console, containing the servers and credentials of your first Memcached Cloud bucket.
Next, setup your app to start using the Memcached Cloud add-on.
EnyimMemcached is a .NET client library for Memcached written in C#. You can easily get it via NuGet.
The MemcachedClient is configured with a Web.config or a App.config files, so be sure to add one to your project.
Use your provisioned MEMCACHEDCLOUD Configuration variables to configure the client:
<configuration>
  <configSections>
	<sectionGroup name="enyim.com">
	  <section name="memcached" type="Enyim.Caching.Configuration.MemcachedClientSection, Enyim.Caching"/>
	</sectionGroup>
  </configSections>
  <enyim.com>
	<memcached protocol="Binary">
	  <servers>
		<add address="<your_memcachedcloud_servers_host>" port="<your_memcachedcloud_servers_port>"/>
	  </servers>
	  <authentication type="Enyim.Caching.Memcached.PlainTextAuthenticator, Enyim.Caching" userName="<your_memcachedcloud_username>" password="<your_memcachedcloud_password>" zone=""/>
	</memcached>
  </enyim.com>
  <system.web>
	<compilation debug="true"/>
  </system.web>
</configuration>
Then, instantiating a new memcached client is straightforward:
MemcachedClient mc = new MemcachedClient();
StoreOperationResult storeResults = (StoreOperationResult)mc.ExecuteStore(StoreMode.Set, "foo", "bar");
GetOperationResult getResults = (GetOperationResult)mc.ExecuteGet("foo");
Our dashboard displays all of the performance and usage metrics for your Memcached Cloud service on a single screen, as shown in the following screenshot:
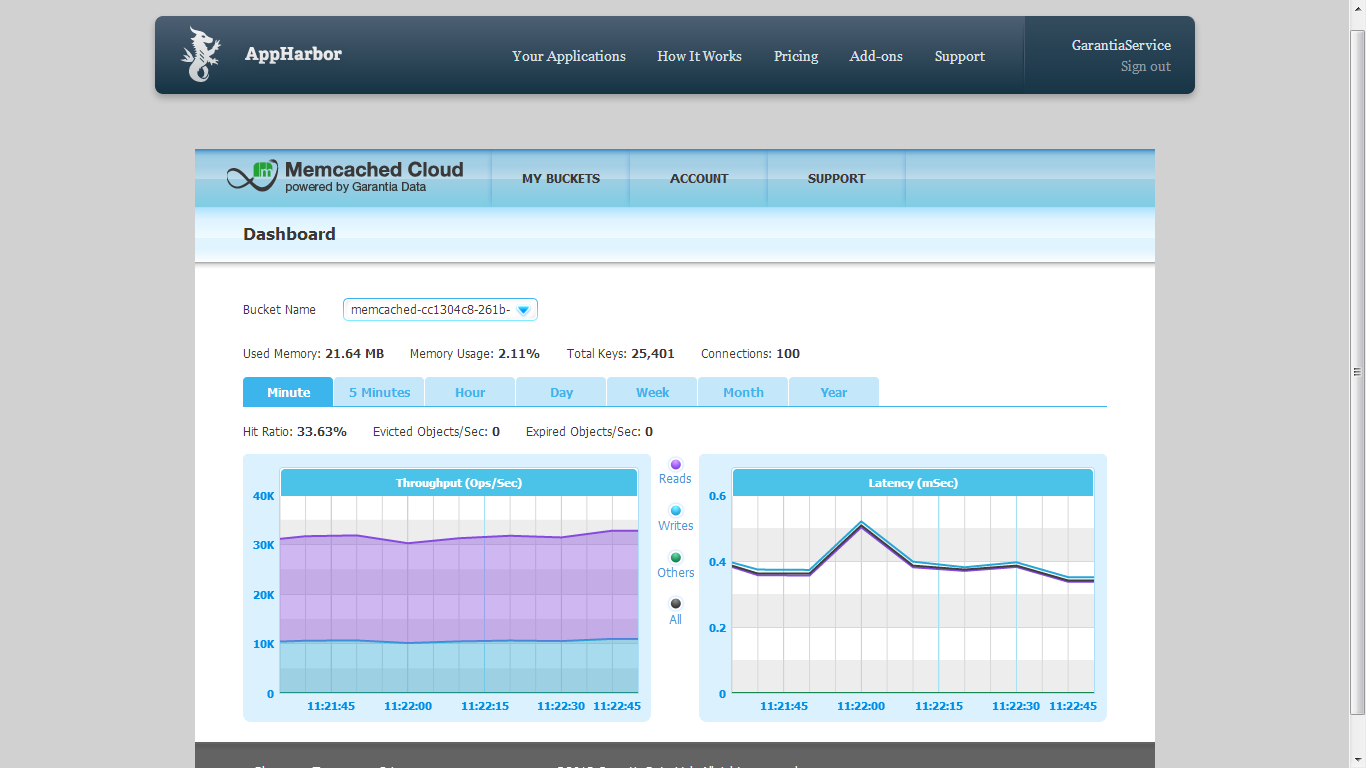
To access your Memcached Cloud dashboard, simply click the “Go to Memcached Cloud” link in the Memcached Cloud add-on management page on your app console.
You can then find your dashboard under the MY BUCKETS menu.
Memcached Cloud allows you to add multiple Memcached buckets to your plan, each running in a dedicated process, in a non-blocking manner (i.e. without interfering with your other buckets). You can create as many buckets as you need, limited by the memory size of your plan.
Your first Memcached bucket is created automatically upon launching the Memcached Cloud add-on and its servers and credentials are maintained in the MEMCACHEDCLOUDConfiguration variables. To add more buckets, simply access your Memcached Cloud console and click the Add Bucket button in the MY BUCKETS > Manage page.
Plans migration is easy and instant. It requires no code change and has no effect on your existing datasets. To upgrade a plan, simply go to the Memcached Cloud add-on management page on your app console, and click the Upgrade button on the plan you choose.
To uninstall Memcached Cloud add-on go to the Memcached Cloud add-on management page on your app console, and click Uninstall . This will destroy all associated data and cannot be reversed!
Contact us if you have any questions at: support@garantiadata.com.